Mexican Meat

As an Arizona native and lifelong resident, I love Mexican food! I cannot go a week without it. This is one of my favorite recipes for Mexican Meat. The recipe calls for either beef or pork or a combination of the two. I have made it all three ways and they are all fabulous. Today, I chose pork. Actually this started last night when I put the pork butt in the oven to slow roast at 200º F.  Here is what it looked like in the morning:
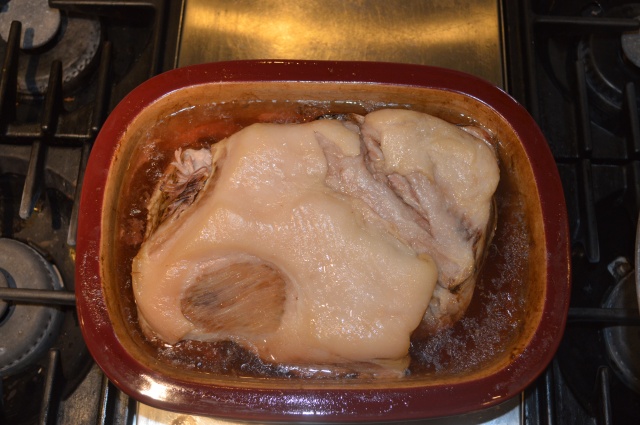
DSC_0271Isn’t it lovely? You can cook the meat with 1 cup of water in a pressure cooker for 35 to 40 minutes or in a crock pot on low for about 10 hours, but I like the results from the oven.
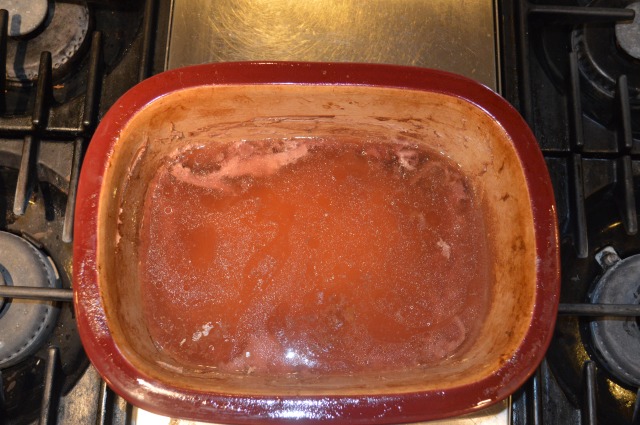
DSC_0272And just look and those amazing juices? We’ll be using these later so just set them aside.

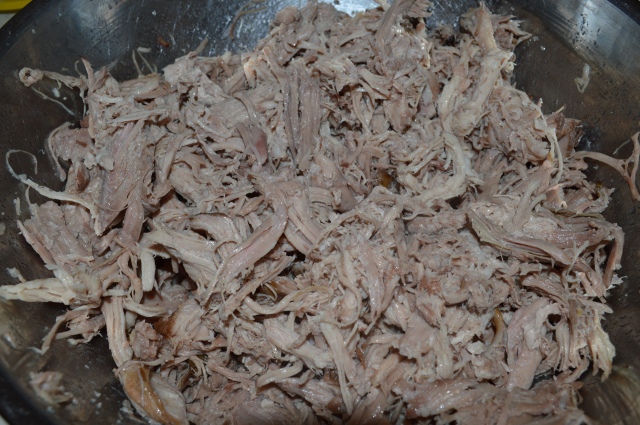
Let the meat cool some and remove the fat and bones. Shred.

DSC_0275 DSC_0276Chop the onion:

DSC_0279Heat the oil in a dutch oven and add the onion and chilis and sauté for a few minutes. I got so caught up in what I was doing that I forgot to take pictures of the chilis…and the garlic. Add the garlic and continue cooking for another minute before adding the green chili salsa. Stir that all together, then stir in the flour along with the salt and cumin. Cook another minute over medium-low heat.

DSC_0280Add the juices that you set aside.

DSC_0281Add the shredded meat and let cook until thick, probably another 5 or 10 minutes.

DSC_0282Just look at that lovely meat!

Now you can do whatever you want with it. Make chimichangas, green chili burros, enchiladas, tacos. It’s also great in scrambled eggs.

Enjoy!

Mexican Meat                                                                                                                                          5 lbs. beef roast, pork butt or combination of both                                                                         3 T. oil                                                                                                                                                       3 onions, chopped                                                                                                                                   4 to 5 roasted Hatch green chilis                                                                                                         2 (7-oz.) cans green chili salsa                                                                                                             2 cloves garlic, minced                                                                                                                           4 T. flour                                                                                                                                                   4 t. kosher salt                                                                                                                                           1 t. ground cumin                                                                                                                                  Juices from meat(s)

Preheat oven to 200º F. Place roast(s) in large roasting pan or a Dutch oven. Do not add salt or water. Cover with a tight lid and roast about 12 hours, until well done. Remove meat to a large bowl, reserving juices. Let meat cool some, then remove fat and bones. Shred meat, and set aside. Heat oil in a dutch oven or very large skillet. Add onions and green chilis. Sauté for a few minutes, then add garlic and sauté for another minute. Add green chili salsa and stir. Add flour, salt and cumin. Cook for a minute or two over medium-low heat. Stir in reserved meat juices and shredded meat. Cook 5 to 10 minutes or until thick.

Posted in Main Dishes | Tagged , , , , , , | Leave a comment

Easy Stir-fried Beef and Noodles

Last summer my twins spent 2 weeks with their best friend up in Idaho.  While there, her mom made a dish that has had my girls longing for ever since.  She sent me the recipe over Christmas and I made it last night.

Cook ramen noodles according to package instructions

Stir-fry carrots and celery

Add pea pods

My favorite teriyaki sauce of all time!

Now I understand why they liked it so much (and why my friend in ID likes it too).  It is really delicious and easy.  You could easily change it up with different veggies.  I made it this way to serve 5 – 6:

Ingredients:

  • 3 3-oz. packages beef-flavored ramen noodles (like Top Ramen)
  • 1 – 1.5 lbs. beef sirloin steak or beef stew meat, cut in pieces about ¼ inch thick
  • 2 T. cooking oil
  • 1 C. thinly sliced carrot (about 2 medium)
  • 1 C. bias-sliced celery (about 2 stalks)
  • 1 12-oz. package frozen pea pods, thawed
  • ½ C. water
  • 2 T. snipped fresh parsley
  • 4 tsp. teriyaki sauce
  • 1 tsp. ground ginger (next time I think I’ll use fresh, but less of it)
  • ½ tsp. crushed red pepper (optional)
  1.  Cook ramen noodles according to package directions, except drain the noodles nad reserve the seasoning packages.
  2. Meanwhile, trim any separable fat from meat.  If using steak, cut into bite-size strips; set aside.
  3. Preheat a wok or large skillet  over medium-high heat. Add oil (you can add more oil as necessary during cooking.)  Add carrot and celery and stir-fry for 2 to 3 minutes or until crisp-tender.  Remove to a bowl to be added back in later.
  4. Add beef to the hot pan.  Stir-fry for 2 to 3 minutes or to desired doneness.  Don’t overcook or could get tough.  Return carrot and celery to the pan.  Stir in noodles, reserved seasoning packages, pea pods, water parsley, teriyaki sauce, ginger, and, if desired, crushed red pepper.  Cook over medium heat until heated through, stirring occasionally.


Posted in Main Dishes, Recipes | Tagged , , , , | 1 Comment

Scrambled Eggs Over Biscuits Smothered in Sausage Gravy

A couple of nights ago my husband and I were watching the Food Network show ‘The Best Thing I Ever Ate Combos’. One of the featured combos was biscuits and gravy. My husband really wanted it for breakfast the next morning so I obliged.

I love this dish because it is so easy and it’s such comfort food. You can make it reasonably good for you too. I used a little bit of whole wheat flour in both the biscuits and the gravy. I like to get some fiber and whole grains in things where I can. My family had no idea. I also use 2% milk in the gravy to cut down on the fat. Believe me, there is no need for cream!

The biscuit recipe I got from my favorite go-to cookbook that I’ve had since college.  It is called Easy Basics for Good Cooking from Sunset.  I love it!  The only thing I changed was that I used ½ cup of whole wheat flour.  I’m putting in the original recipe, though.  If you all want to substitute some whole wheat you’ll have to remember on your own.

Buttermilk Biscuits

  • 2 C. all-purpose unbleached flour
  • 2 ½ tsp. baking powder
  • ½ tsp. baking soda
  • 1 T. sugar
  • ½ tsp. salt
  • 5 Tbls. solid shortening (I used butter flavored)
  • ¾ C. buttermilk

Preheat oven to 450º F.  In a bowl, sift together dry ingredients.  Using a pastry blender, cut in the shortening until it is like coarse cornmeal.  Make a well in the center and pour in milk all at once. stir with a fork until dough cleans sides of bowl.

With your hands, gather dough into a ball; turn out onto a lightly floured board.  Knead about 10 times (dough will feel light and soft, but not sticky).  Roll out our pat dough into a ½ -inch-thick circle.  Using a floured 2-inch cutter (I use a can), cut biscuit rounds as close together as possible, since rerolling toughens dough.  Fit leftover bits of dough together, pat smooth and cut.  Place biscuits close together (for soft sides) or 1 inch apart (for crispy sides) on an ungreased baking sheet.

Bake for 15 to 20 minutes or until tops are lightly browned.  Quantity will vary depending on the size of you cutter.  My cutter was a little bit bigger than 2″ and I got 8 biscuits.

Sausage Gravy

  • 16 oz. good bulk sausage (I use Jimmy Dean)
  • 4 Tbls. shortening
  • 6 Tbls. flour (I used 2 T. whole wheat)
  • 3 C. 2% milk
  • salt and pepper to taste

Cook sausage in a skillet over medium-low heat, stirring and breaking up.  With a slotted spoon, remove the browned, crumbled sausage to a paper towel-lined plate.  Add the shortening to the drippings in the skillet.  Add flour, stirring until blended and bubbling.  Gradually add the milk; continue stirring and cooking until thickened and bubbly.  Add the sausage.  If too thick, add a little more milk.  Add salt and pepper to taste.

I followed a recipe from About.com, but doubled it.  You can find the original recipe here.

We made very simple scrambled eggs for this dish.  They were seasoned with salt and pepper only.

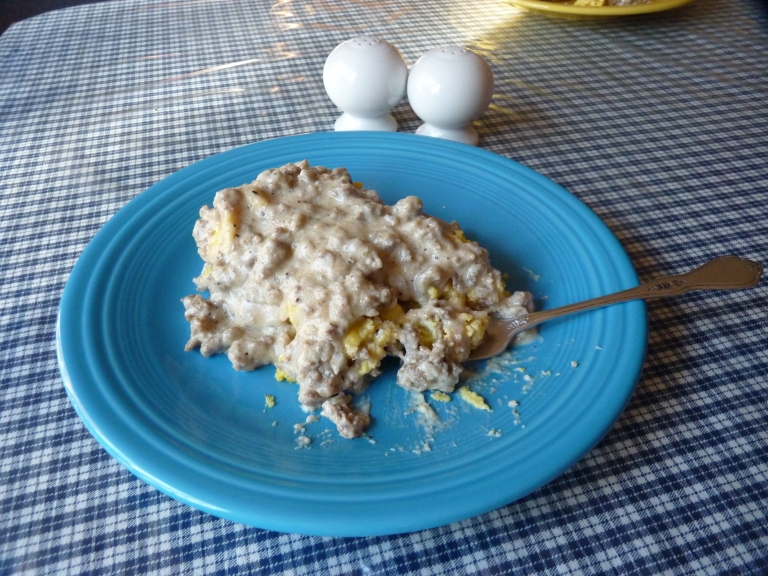
To serve:  open a biscuit, top with eggs and smother with sausage gravy.  It is delicious and deceivingly filling.

Eggs With Biscuits and Gravy


Posted in Main Dishes, Recipes | Tagged , , , , | Leave a comment

How to Spend Countless Hours Online

I have been so obsessed with Pinterest since discovering it about 2 months ago that I have trouble tearing myself away from it. At least it does have benefits (unlike some other sites). I have actually made several things I’ve seen on there – like hand cream, laundry detergent, sugar scrubs, and some beautiful decorations for my daughters’ bedroom. And recipes.
I just discovered a craft site from a pin that I love! It isn’t so much a craft site in and of itself, but it is a compilation of pictures of crafts which link you to the sites which give you the instructions (much like Pinterest). This site is called craftgawker.  Here is a link:  http://craftgawker.com/ .

Posted in Uncategorized | Tagged | 1 Comment

Making Granola

I really do like to make things from scratch.  I have only made granola a couple of times, though.  I don’t know why I don’t make it more often.  Maybe it’s because when my family finds out there is homemade granola in the house, 10 cups of it disappears in about 3 days. Okay, maybe that is a slight exageration…..but then again, maybe not.

It is an easy process and really does cost a lot less than buying it.  Plus, you have the added advantage of being able to put whatever you want into it.

The raw mix

I started with 10 cups of rolled oats.  From there you can add whatever you want.  I just put in what I had on hand: slivered almonds, pine nuts, sesame seeds, and unsweetened shredded coconut.  Stir it all up well in a large bowl.

Honey, maple syrup, molasses and oil

Granola is sweet.  There is no getting around this, but that’s why we like it so much.  I wanted to use several different sweeteners just to give it some depth of flavor.  I used honey, molasses and both dark and light brown sugars.  I also used some grade B maple syrup that I had left over from another recipe.  There wasn’t enough to really give it a maple flavor but it was a good way to use it up.  I think putting more in sometime would be excellent, though.

For the oil, you can use whatever you want: canola, vegetable or safflower will do.  I used coconut, though, because I love the flavor and I believe it to be better for us.

Heat the sweeteners and oil on the stove.  Add salt, cinnamon and vanilla.  Heat this long enough that the sugar dissolves but don’t boil it.  Just a note here, this is not a good time to stir absent mindedly while perusing Facebook on your phone.  I almost made taffy.

Pour the syrup over the dry ingredients and stir it up really, really well.  You don’t want any hidden dry areas.  Spread this mixture out evenly onto 5 cookie sheets with sides.  I found the ones that worked the best were a flexible jellyroll pan and a stoneware pan.  The thinner you can spread it the easier it will be to get off the pan when it’s done.

Bake at 325 degrees.

I baked it for 20 minutes, then stirred it all up and baked for another 12 minutes – 2 to allow the oven to get back to temperature and then 10 at temp.

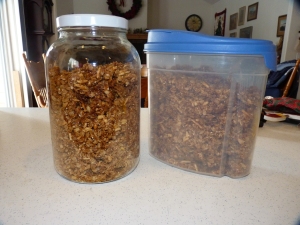
Allow the granola to cool completely!  If you put it in airtight containers while it is still warm at all, it will get soggy and might even mold.

Sure, it looks like a lot, but it will be gone in just days.  :o)

Granola

  • 10 C. rolled oats
  • 1 C. wheat germ
  • 1 – 2 C. unsweetened, shredded coconut
  • 1 C. sesame seeds
  • nuts (a variety is great, but you can also leave them out if there is an allergy) to taste
  • 1 1/2 C. brown sugar, packed
  • 1/2 C. honey
  • 1/2 C. molasses
  • 1 1/2 C. oil
  • 1 1/2 tsp. salt
  • 2 tsp. cinnamon
  • 1 Tbl. vanilla

Enjoy!

Posted in Main Dishes, Recipes | Tagged , , | 2 Comments

Soda Biscuits (base recipe)

It has been a ridiculously long time since my last post.  I have no excuse.

A couple of weeks ago I ran across a fabulous biscuit recipe that is the easiest I’ve ever made.  It is a great base recipe that can then be made sweeter or more savory with various stir-ins depending on what you’re serving them with.   I cannot tell you how much I love this recipe because of its versatility and ease.

Here is the base recipe.  I will include the 2 variations I’ve made at the end.

Soda Biscuits

Ingredients:

  • 3 C. flour
  • ¼ C. to ½ C. sugar (depending on sweetness desired)
  • 1 t. baking soda (¾ t. for high altitude)
  • ½ t. Kosher salt
  • ½ C. (1 stick) butter, room temperature
  • 1 ¼ C. buttermilk*

*You can substitute sour milk or 1 cup 3 T. of sweet whole milk mixed with 1 T. of white vinegar.

Directions:

  1. Preheat oven to 425º F.  Spray a standard muffin pan with cooking spray.
  2. In a large bowl, whisk together flour, sugar, baking soda, and salt.
  3. Cut the butter into tablespoon sized pieces into the bowl of flour.  Using your (hopefully clean) hands work the butter into the flour, schmooshing the butter between your fingers and mixing with the flour until the mixture resembles a coarse meal.  If you are stirring in any add-ins, now would be the time to do it.
  4. Make a well in the center and pour in the buttermilk.  Using a wooden spoon, gently mix the flour into the buttermilk until the flour is moistened but being careful not to over mix.  The dough will be quite sticky.
  5. Working quickly, make “balls” of dough (really they’re more like globs) with your hands and place them in the wells of the muffin tin.  It is really gooey – avoid the temptation of over handling the dough.  Just loosely place it in the wells.  If you need to go back and add more to some to use all the dough up then just place the extra on top of the already placed dough.  It will all back together just fine.
  6. Bake 12-13 minutes (15-17 minutes in high altitude) until tops are browned.  Remove from oven and let cool for a couple of minutes before removing to a wire rack to cool for a few more minutes.

Makes 12 buscuits

Variations I have made:

Cranberry Orange

Follow base recipe, but change sugar to approximately 1/3 C. and add ¾ C. dried cranberries (like Craisins) and the fresh zest of one orange.

Cheddar Biscuits

Follow base recipe, using ¼ C. sugar and adding 1 C. shredded cheddar cheese.

Posted in Recipes, Side Dishes | Tagged , , | 1 Comment

Cinnamon Quick Bread

This morning I got up to a house that was 59º F.  That was on the inside of the house.  It was 4º F. on the outside.  Comparatively the house was warm, but it was still freezing to us.  We had the heat on.  We had a space heater running.  We had a fire burning in the fireplace.  We were still cold.  What to do.  Bake, of course!  We desperately needed the oven going too.

I wanted cinnamon bread – raised cinnamon bread.  That was going to take hours of raising.  Did I mention the temperature in my house?  Not very yeast friendly.  Granted, I could have set my oven to 100º and raised it in there, but I also didn’t want to wait the 4 hours to eat the bread.

So I did the next best thing.  I made cinnamon quick bread.  I found a recipe I liked the look of, but changed just a couple things.  I didn’t have any whole wheat flour on hand so I used all white flour.  I cut the sugar in half and I added some ground cardamom.  I only added ¼ teaspoon.  Next time I think I’ll add ½ teaspoon.  This would be fabulous with toasted pecans or walnuts.  Next time I think I’ll add some.  I adapted it for high elevation as well.  I have put those changes in parentheses.

Adapted from http://www.cookingforseven.com/2011/01/cinnamon-bread/

Cinnamon Quick Bread

Ingredients:

  • 2 C. all-purpose flour
  • ½ C. sugar
  • 2 tsp. baking powder (1 ½ tsp. )
  • ½ tsp. baking soda (3/8 tsp.)
  • 1 ½ tsp. cinnamon
  • 1 tsp. salt
  • ¼ tsp. ground cardamom
  • 1 C. buttermilk or sour milk
  • ¼ C. butter, melted
  • 2 large eggs
  • 2 tsp. vanilla
  • 4 T. butter, cut into small pieces
  • 1 T. cinnamon

Directions:

  1. Preheat oven to 350º F.  Grease a 9 X 5 inch loaf pan.
  2. In a small bowl cut the 4 T. butter into small squares (pea sized) and toss with 1 T. cinnamon.  Keep in the refrigerator until ready to use.
  3. In a large bowl combine flour, sugar, baking powder, baking soda, cinnamon, ground cardamom and salt.
  4. In another bowl whisk eggs, buttermilk, melted butter and vanilla together.
  5. Add the wet ingredients to the dry ingredients and mix just until moistened.
  6. Gently fold in the cinnamon covered butter pieces.  Pour into prepared loaf pan.
  7. Bake for 45 minutes. Let cool in pan on a rack for 10 minutes.  Turn out and let cool until loaf will cut without crumbling.  Serve with a little butter and some cinnamon/sugar sprinkled on top.


Posted in Recipes, Side Dishes | Tagged , , | 2 Comments

Ratatouille

I have been busy making some new dishes.  What I haven’t been busy doing is posting them on here.  Well, that is changing today.

Right now, as I type, I am eating left over Ratatouille that I made the other night.  It was (and still is) delicious.  This was the first time we had ever had this French dish.  My husband and I loved it, one of the girls liked it and the other….well, she is not a fan of eggplant, so she ate it, but I think she would be happy if I never made it again.  That isn’t going to happen though.  I loved it.

So, here is my version of

Ratatouille

  • 2 T. olive oil
  • 3 cloves garlic, minced
  • 1 eggplant, cut into ½ inch cubes
  • salt to taste
  • fresh basil, oregano, parsley, and rosemary, chopped
  • 2 zucchini, sliced
  • 1 large onion, sliced into rings
  • 2 C. sliced fresh mushrooms
  • 1 or 2 T. dried bell pepper
  • 4 Roma tomatoes, chopped

Directions:

  1. Preheat oven to 350º F. (175º C.). Coat bottom and sides of a 1 ½ quart casserole dish with 1 T. olive oil.
  2. Heat remaining oil in a medium skillet over medium heat.  Sauté garlic and onion until lightly browned.  Mix in fresh herbs.  Just use as much or as little as you want.  Yes, it’s vague.  I know, but it’s a personal taste thing.  Add eggplant and dried bell pepper.  Sauté until eggplant is soft, about 10 minutes.  Season with salt to taste.
  3. Spread eggplant mixture evenly across bottom of prepared casserole dish.  Sprinkle with a few tablespoons of Parmesan cheese.  Spread zucchini in an even layer over top.  Lightly salt and sprinkle with a little more cheese.  Continue layering in this fashion, with mushrooms and then tomatoes, covering each layer with a sprinkling of salt and cheese.
  4. Bake for 45 minutes.


Posted in Main Dishes, Recipes | Tagged , , | 2 Comments

Angel Chicken Pasta

This recipe is so incredibly easy, but tastes elegant enough to impress company.  I found it on AllRecipes.  Here is the link: http://allrecipes.com/Recipe/Angel-Chicken-Pasta/Detail.aspx

The original recipe says to use 6 chicken breasts for 6 servings, but we can’t eat that much.  I figure 1/2 a breast per person.  That said, I’m putting the recipe down as the original one appears.

6 boneless, skinless chicken breasts

1/4 C. butter

1 (.7 oz.) package dry Italian salad dressing mix

1/2 C. white wine

1 (10.75 oz.) can condensed golden mushroom soup

4 oz. cream cheese with chives

1 lb. angel hair pasta, cooked according to package directions

Directions:

1. Preheat oven to 325º F. (165º C.)

2. In a large saucepan, melt butter over low heat.  Stir in dressing mix.  Blend in wine and soup.  Mix in cream cheese and stir until smooth.  Heat through, but do not boil.  Arrange chicken in a single layer in a 9 x 13 inch baking dish.  Pour sauce over.

3. Bake for 60 minutes.

4. Serve chicken and sauce over cooked angel hair pasta.

Posted in Main Dishes, Recipes | Tagged , | Leave a comment

Guide to Baking/Cooking At High Altitudes

For those of you not familiar with Flagstaff, we sit in the mountains of northern Arizona at an elevation of 7000 ft. (about 2300 m.) above sea level.  This can make for some interesting baking (and cooking to a lesser extent) experiences.

The atmosphere is thinner here so the pressure is lower and there is less oxygen.  Water boils at a lower temperature. Roughly, the temperature at which water will boil drops just under 1º F per 550 ft.  At sea level it boils at 212º F, so  at 7000 ft. it boils at approximately 200º F.  This means that food takes longer to cook. For cooking all that is usually required is a longer cooking time.

Baking is something entirely different.  Due to the decreased air pressure breads rise more rapidly, then fall and bake into a dense loaf of disappointment.  When baking quick breads or muffins, simply decrease the leavening agent by 25%.  When baking yeast breads there may be more fine tuning involved.  I have had to play with decreasing the yeast, sugar or both.  Other variables come into play as well, such as what type of flour you are using. Here is a comprehensive guide to high altitude baking/cooking published by Pillsbury. It is the best guide I’ve ever run across.  http://www.pillsbury.com/Recipes/High-Altitude-Guide

Posted in Recipes | Tagged , , | Leave a comment